
Emergency Essentials sells a case of 12 (100 hour) emergency candles for $54, not bad and probably more candle action than I’ll ever need. If I didn’t feel like dropping $54 plus shipping I could also head down to the Dollar Store and probably picked up enough regular candles to stuff in a grocery bag for around $25. Why go the easy route? I thought to make the move into candle making in order to learn a few things and have an excuse to spend some time with my daughter.
Most people would conduct a decent amount of research prior to diving into a new project, not me. I spent exactly 3 to 5 minutes researching my project online (and the results reflect that) before picking up the supplies. I consider this my beta test, my practice run, my chance to make mistakes (and spill a bunch of wax) before going into full production. What follows are the pictures which detail my foray into candle making and the genuinely sub par results which I ended up achieving. Learn from my mistakes and offer suggestions if you have them!
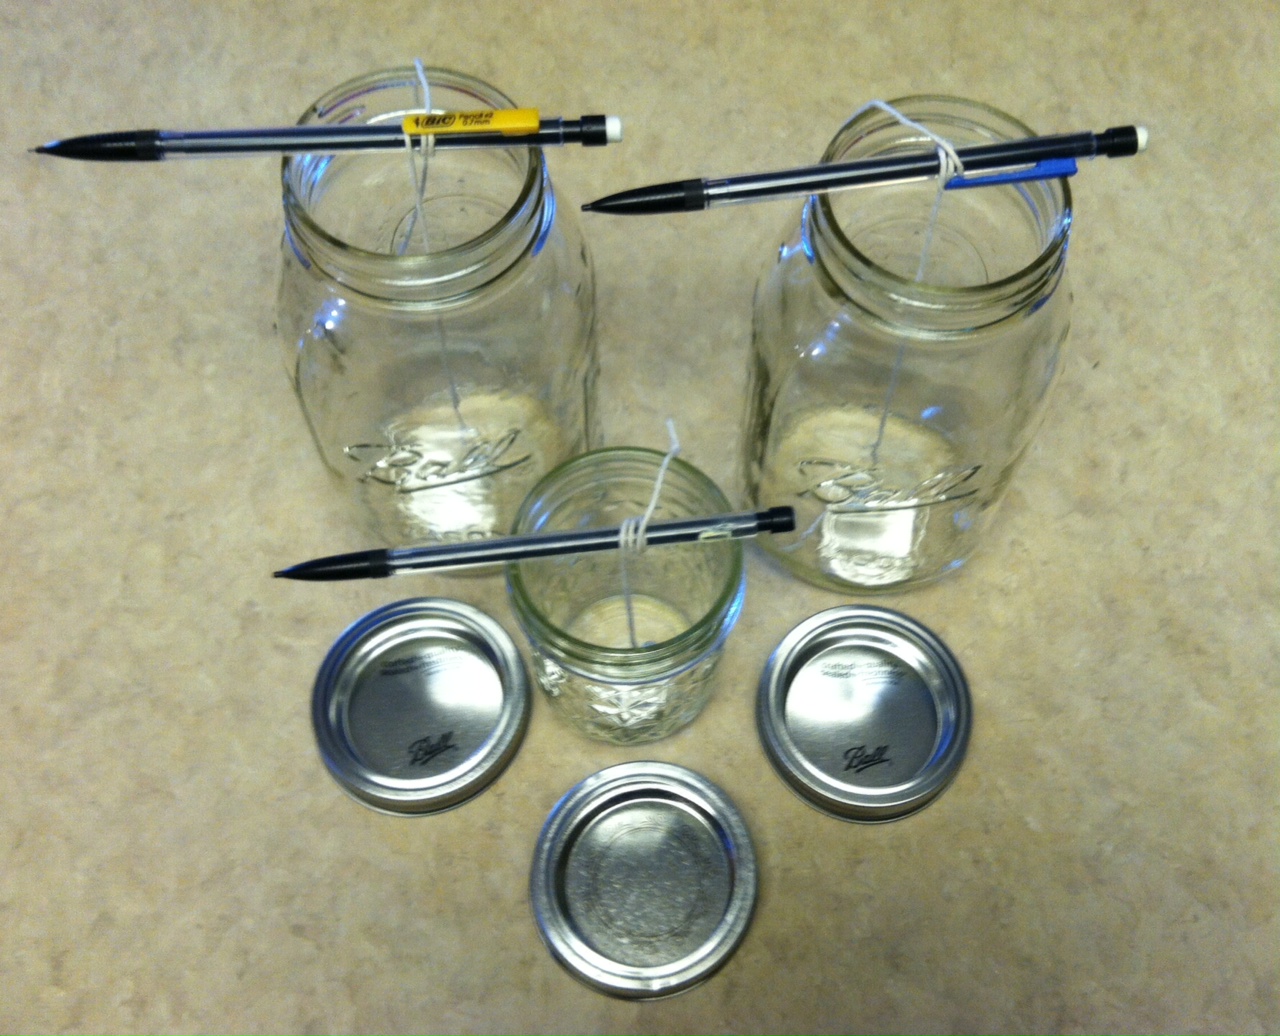
Step 1: Gather supplies. I utilized Gulf Wax (paraffin wax) along with some twine, misc mason jars, a “double boiler” and Pyrex jar for transferring hot wax.

Candlemaking Supplies
Step 2: Buy wicks? Nay! I wanted to use some simple twine and the first step was to set the proper lengths of the wicks relative to the height of the container. I had read that you were supposed to soak the twine in various substances prior to utilizing it, I chose to ignore that because I was impatient.
Setting the wicks
Step 3: Anchor the wicks. A few small bolts from my garage were enough to anchor the bottom of the wick to the jar.
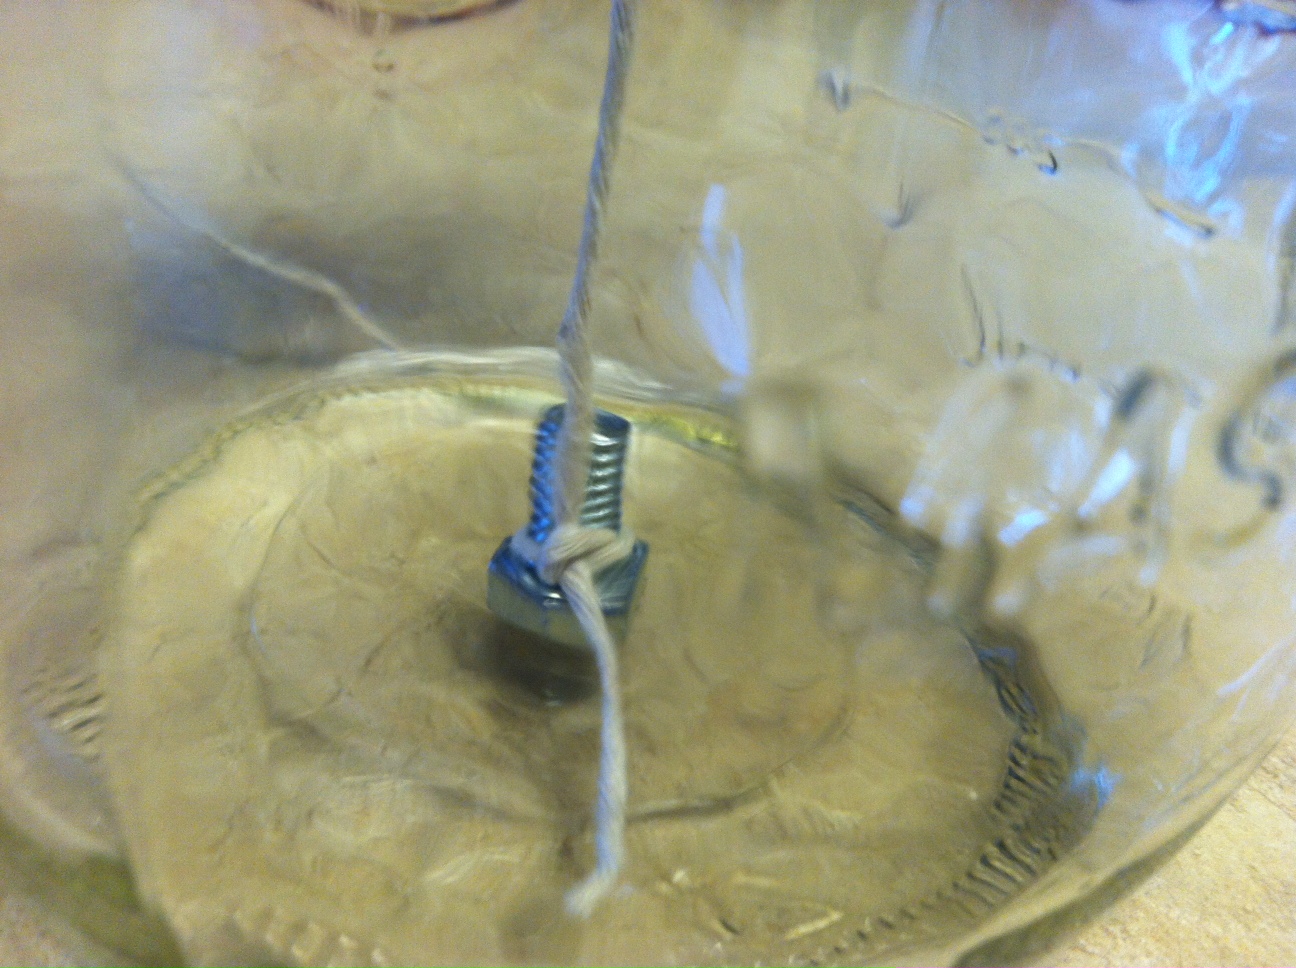
Anchoring the Wick
Step 4: Prepare the wax for the double boiler. I made sure NOT to utilize my wife’s good knives for this operation.
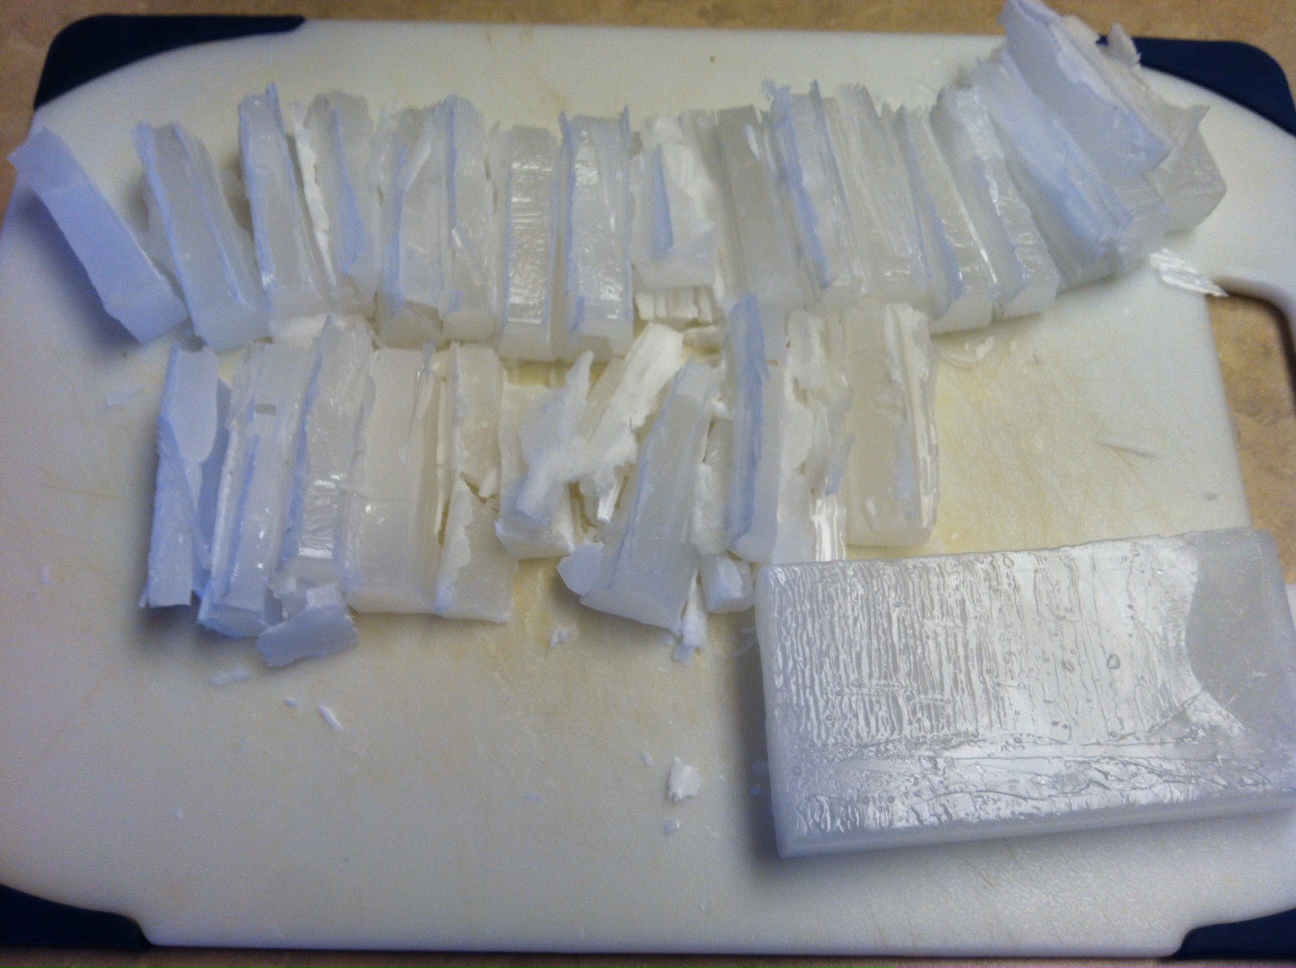
Chopping the Wax
Step 5: Carefully place the wax in the double boiler, heat slowly until all solid wax has been melted down into liquid form.

Wax in Double Boiler
Step 6: Transfer the wax to the receptacles, make sure to put down newspaper (or similar) to prevent wax from getting all over the counter. Green oven mitt is optional. During this phase I also tried to coat as much of the upper wick as possible, the part which would be lit by a match initially.
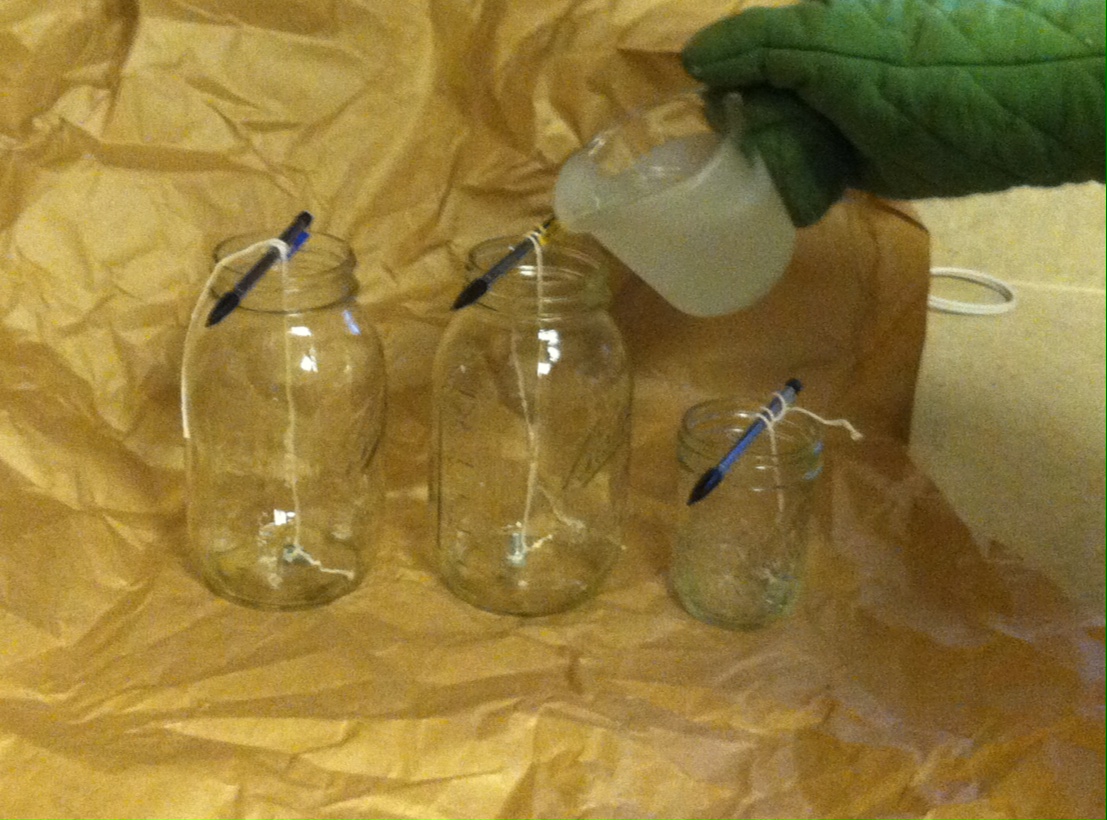
Transferring Wax
Step 7: Allow wax to dry. For some reason the wax sinks pretty significantly and this became very noticeable after 24 hours. Notice the chopped up can of Coke, that was what I used to capture the leftover wax.
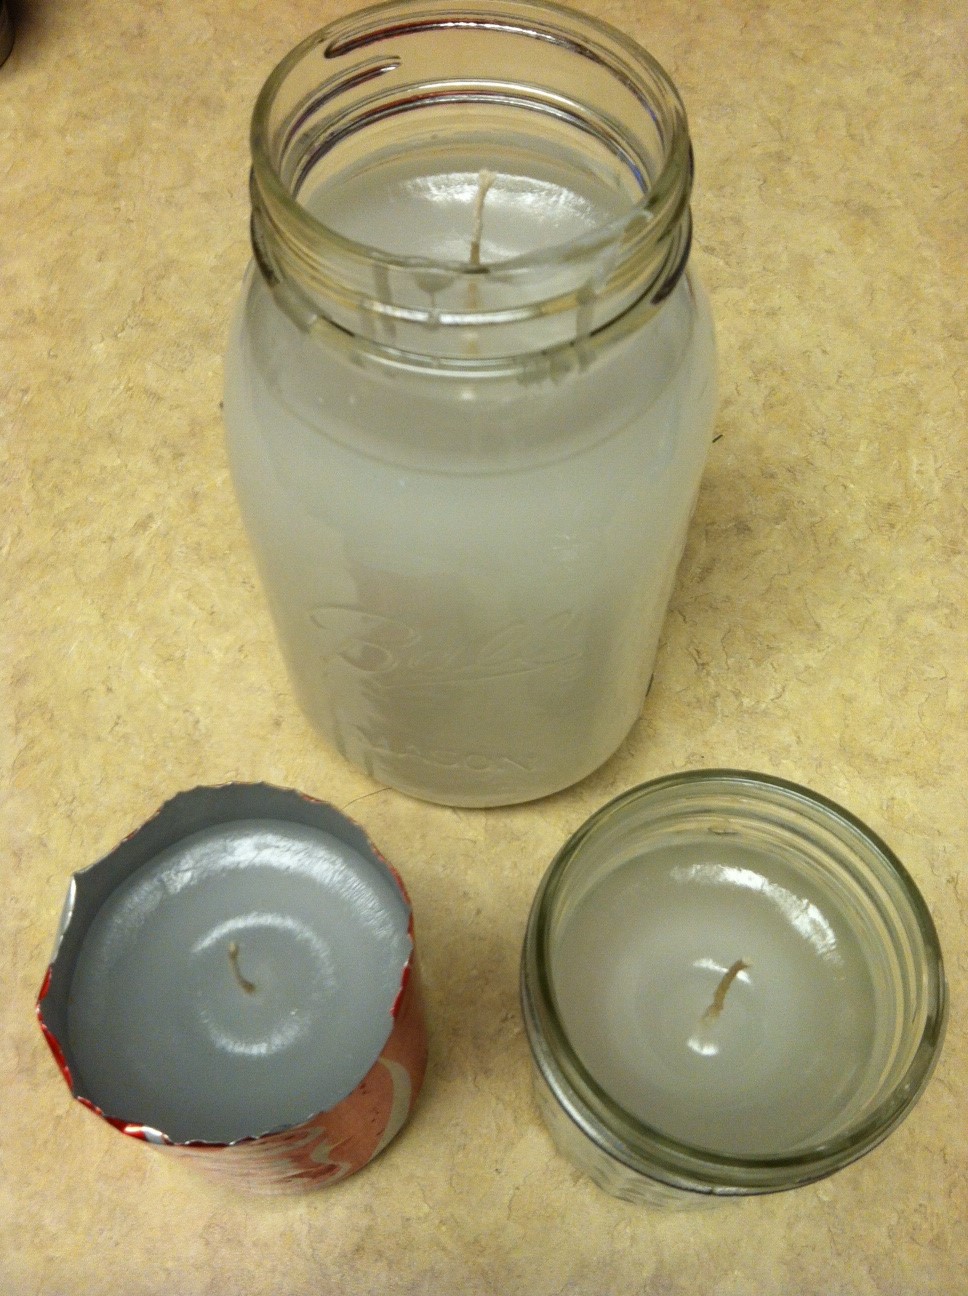
Finished Candles
Step 8: Light one up and admire your creation! The candles do work although I have work to do in order to perfect my method. The bottom line is that while I could have easily purchased these it was a much more valuable learning experience trying to make them. Give it a try sometime!
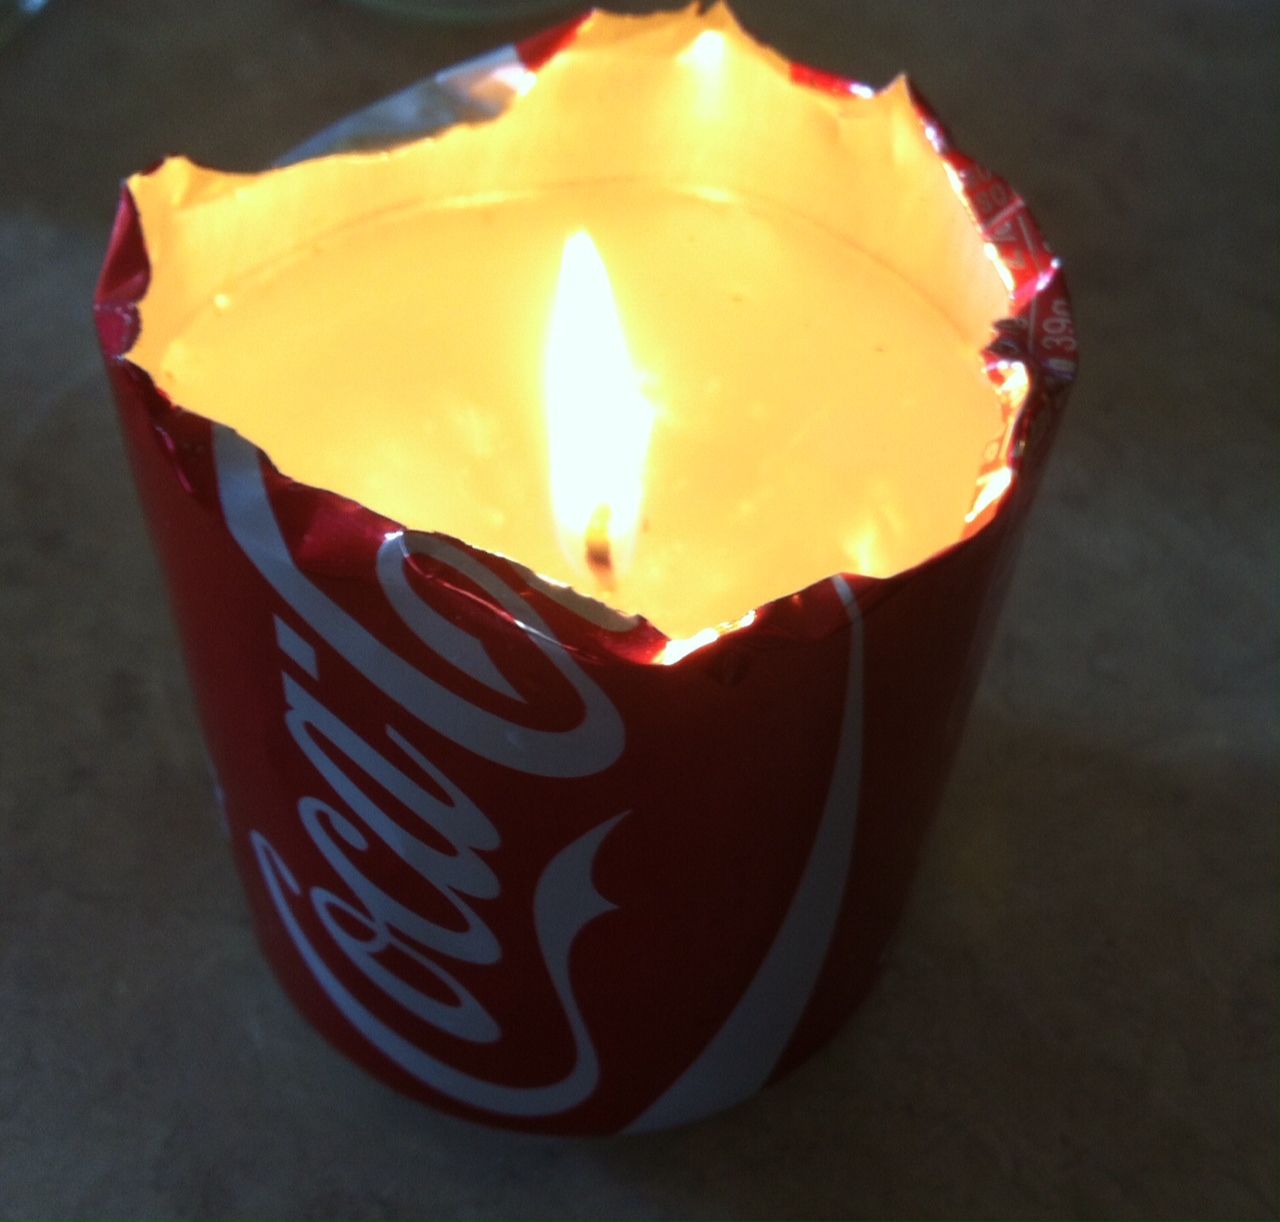
Victory!
Edit: 10/16: My daughter made some candles of her own and her results were much better than mine. She used bits of crayon in order to get the color she wanted.
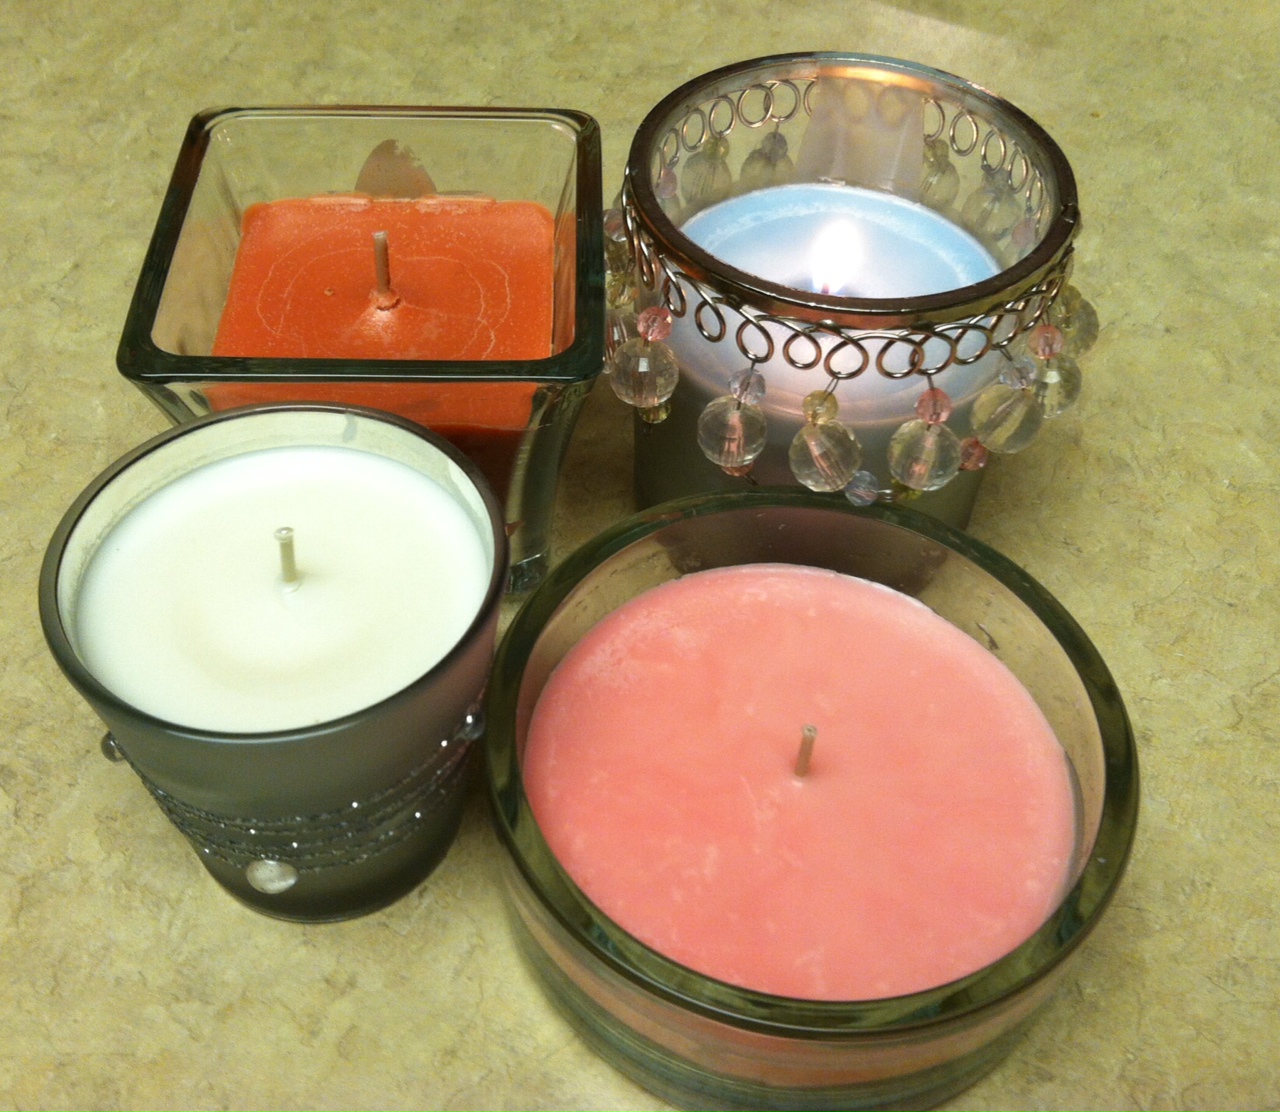
My daughter’s candles


10 comments
Skip to comment form
I have some experince with this and can offer some input. Wax tends to expand when it heats up, similar to metal. When it cools it will contract. I usually wait and hour or so and then top the wax off to compensate for this.
Author
Good call, my wife mentioned that after it was already too late.
Broken crayon pieces add nice color to the wax.
Author
Thanks, my daughter used this method yesterday and I posted a picture of her work.
Hello everyone. My husband and I have been making 40 hour candles for about a year now. We use Soy wax(cheap on line) we go to the Goodwill and buy half pint Karr or Mason jars for about 29 cents a jar. This size jar makes a 40 hour candles plus. We add a little color to them just because but NO sent. it has been fun making them. Our son came and go 100 of them to store away. We put a book of matches and a piece of heavy foil on the top and seal them up with a lid. That way you always have a way light it and you can put the foil behind the candle to make it brighter.
P.S. the candles cost us about 54 cents to make. And the don’t take up to much space.
I prefer beeswax, personally. Nothing against the other types of wax; they all work well. I can get beeswax from loocal beekeepers at a decent price. i prefer the same type jars you mention, Christie, as they can have lids put on them as well when stored, should you desire.
The bolt at the bottom will heat up when the flame gets to it and could cause a fire. That’s why the store bought tabs have little legs to keep them off of the bottom of the glass.
Author
Great input Steve, thanks for commenting.
I was never a fan of candles until I did some testing and found out you can do some serious cooking with them. Also note that it is safe cooking indoors.
http://www.instructables.com/id/Cooking-With-Three-Candle-Flames/?ALLSTEPS
You can also use them to heat up water and therefore melt snow as a source of water.