
 It’s very easy to get lost while in the woods, or for that matter just about anywhere. I have been lost many times and am not ashamed to admit it. Getting lost is the easy part and can be accomplished through complacency, overconfidence or just poor dumb luck. There have been times where I was 110% sure that as soon as I crested a small hill, passed through a tree line, came out of a swamp, that I would be exactly in the place I had planned to go.,..only to end up standing there confused and wondering where the heck I was at. Throughout all of my adventures one essential tool remained at my side and that was the compass. I should note here that the compass never made a mistake or miscalculation, for sure anything that had to do with me getting lost can be attributed to human error.
What I would like to address today are some very basic uses and tips for utilizing a compass. None of these are beyond day one JROTC instruction. Additionally there is no requirement to have a military style topographical map to follow along. I choose to do it this way because the reality is while most preppers do have a compass in their BOB they would be lucky to have a road atlas in there too, much less a 1:50,000 MGRS topo map. You have to crawl before you can walk and walk before you can run. Consider this the crawl phase of compass basics.
What a compass is: A compass is a navigational instrument that measures directions in a frame of reference that is stationary relative to the surface of the earth. The frame of reference defines the four cardinal directions (or points) – north, south, east, and west. Intermediate directions are also defined. North corresponds to zero degrees, and the angles increase clockwise, so east is 90 degrees, south is 180, and west is 270. These numbers allow the compass to show azimuths or bearings, which are commonly stated in this notation.
Translation: A compass will tell you which direction you are going and pretty accurately too. It doesn’t need batteries, is cheap to purchase, is durable and will fit in your pocket.
Basic uses for a compass.
1- Calculate Cardinal Direction. It’s pretty simple, the compass knows which way is north. If you don’t have a military style compass pull out your iPhone and open up your Compass utility just to get a basic idea of what I’m talking about. If you stand in one spot and slowly turn you will see that the needle always points towards north (I’ll get into the different types of north in a bit). This matters because having a compass will help you to maintain your directional heading while in the woods. You might think you will be able to track the sun, the north star or find moss growing on a certain side of a tree but a compass will prove more accurate in just about every circumstance.
2- Orient a Map. In most instances the top of a map is north, be it a military map or a road atlas. This is important because combining the map with your compass will help you to ascertain which direction you are facing relative to the map. Let’s say you lay your road atlas down on the ground and then your compass on top of it. If you turn the map so that the top of the map is aligned with the north seeking arrow on your compass you are good to go. Now you can look at the map and easily differentiate which way you need to travel because it is “calibrated” in line with your physical location. If you see that you want to get to a road and it is on the right side of the map, that is east. You now know that you can walk (using your compass) at a heading of 90 degrees and eventually you will come to that road.
3- Assist in maintaining course heading. Now that you know the direction you need to travel you can utilize your compass to stay on course. Initially you might believe that it is easy to walk in a desired direction and you’ll have no problems. Nothing could be further from the truth, especially when traveling over uneven terrain or through swamps and especially at night. If you need to go at a 90 degree heading a compass will help you to stay on course the entire time.
Compass tips.
1- Know the difference between true vs magnetic north. A compass does not point to the north pole, or the exact center of the earth somewhere up there in the arctic. That in fact is true north. The compass points towards magnetic north, or a point on the earth’s northern hemisphere where the planet’s magnetic field points vertically downward. The difference between these two north’s is referred to as magnetic declination. For basic navigation and generally finding out where you are at over short (a few miles) distances it really isn’t all that big of a deal. Yet you should realize that there is a difference between where the arrow on your compass points and the actual top of the earth.
2- Do not use a compass near any metal objects. Using a compass inside of your vehicle, in a building or next to a metal fence could throw off your heading. Try to use your compass out in the open a few paces away from any metallic surfaces.
3- How to hold a compass. For ease of use I prefer to cup the compass in the palm of my hand and hold in next to my chest. I then look down at the compass and rotate my BODY, not the compass, when trying to “shoot an azimuth.” That’s fancy talk for making sure I’m facing the direction I need to be facing. Let’s say that I know I need to go east and that I know east = 90 degrees on the compass. I will hold the compass in the manner I previously described and rotate my body until I am facing east. I will then look up and identify an object (hilltop, tree, large rock, telephone pole) that is in my direction of travel. I can then put the compass away and start walking in that direction towards my destination. Upon reaching that first object I simply repeat the exercise and continue walking.
4- Alternate points of reference. I would avoid trying to glance down at the compass while on the move. Rather shoot your azimuth, find your point of reference and walk to it. Shoot another azimuth, put away the compass, walk to it and repeat. If you are using trees and telephone poles I would alternate which side of the reference point you end up on each time you arrive. This will help you to stay on course, almost like a self correcting technique.
5- Use the bezel ring. This portion is somewhat advanced but can be a real time saver. Military style compasses have what’s known as a bezel ring on the outside, just like the ones that can be found on many watches. This bezel ring usually as a tick mark on it, quite often it also illuminates at night. If you know that you need to go east (or 90 degrees) you can set the tick mark on your compass to 90 degrees once you align yourself in the right direction. Basically before you set off you align the tick mark on the bezel ring with the arrow on the compass. Once you are moving along to check your heading all you have to do is make sure that the arrow and tick mark are still aligned and move on, no waiting to check the proper degree every single time. This is especially helpful in low visibility situations.
6- Where to purchase. The Compass Store, Backcountry.com, Opticsplanet.com, Ranger Joes, Amazon.


9 comments
1 ping
Skip to comment form
Nice basic article on the compass. Land-nav is becoming a “lost art” of sorts due to all the technology. People would do well to have basic skills. Boy Scouts still push land nav. I heard the Army backed off for a while on the subject, but have brought it back. Electronic and man-made things break. we should go back to basics on everything if you ask me. Nice job.
Author
Thanks for the vote of confidence. When the $250 Garmin breaks, then what?
Great article. It was a nice refresher on the basics.
My compass is mounted on a clear rectangle. On one of the short ends
it says Read Bearing Here with an arrow. Can you explain what this is for?
Can you point me in the direction of an article that will delve into just a slight bit more than basic navigation?
Thanks for the information.
Author
Beth,
I searched around online and found a pic of a similar compass to yours:
The “Bearing” or “Read Bearing Here” annotation is a reference point that you can use while holding the compass. If you hold the compass in your hand the Arrow and Bearing should be facing away from you, so that when you look down at the compass to get your reading it will align with the red arrow on your compass.
For more instruction check out all of the free downloads on http://www.landnavigation.org
Hope that helps.
PJ
Thanks PJ
Simple enough. 🙂
The Silva is the only compass I’ve ever used. When Boy Scouts want to ‘borrow’ it for Orientation Merit Badge requirements, they have to give me something of value to them (wallet, belt, etc) to insure the return of my compass.
I agree, electronic equipment will eventually fail you. Good to know somebody else realizes that the old ways are not something that should be forgotten.
Author
Connie, the old ways should not be forgotten! I’m all for going into the woods with the latest technology to make life easier, but if the batteries die then what? Being able to read a map and utilize a compass is an essential survival skill.
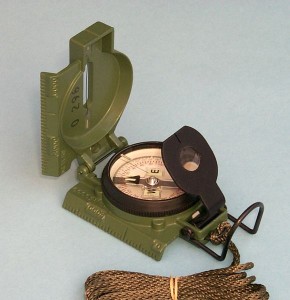
Unfortunately you show a picture of a lensatic compass but give instructions for a baseplate compass. I was looking for instructions per the pictured compass.
Author
Stuart,
Not sure I follow? Instructions listed work for a lensatic compass, only thing I didn’t write about was the difference between compass to cheek and center hold method (because I’m not a fan of the compass to cheek).
[…] View the original article at The Ultimate Prepper & Survivalist Blog. […]